C# Smart contract development environment
Objective: Meet the development requirements
Main points:
System requirement
Visual Studio Setup
Neo-Compiler
For NEO C# developers, it is very fortune for them because NEO blockchain is build based on the C# and therefore, from compiler to toolbox, the C# development environment has been widely supported and it is very easy for those .NET developers begin to learn NEO Smart contract development. It is also easy for users who did not get touch with C# to begin his smart contract and Dapp.
Environment
For smart contract using C#, the best way is to develop with a local development environment with a IDE which support the NEO smart contract. Luckily, NEO is preparing a number of tools that achieve this. The only requirement for that is the operating system of your computer is Windows, preferred Windows 10 64 bit.
For non-windows users, such as MAC and Linux users, the best choice is to use the online editor and compiler which is more convenient for smart contract developing and deploying. This will be detailed in this document.
Windows
In order to set-up a NEO private net and development environment, developer must install some dependencies:
In addition, in order to develop the C# based smart contract, also we have to use the IDE and the best choice is Visual Studio:
Now let us prepare the smart contract development environment.
Visual studio setup
Install and open visual studio.
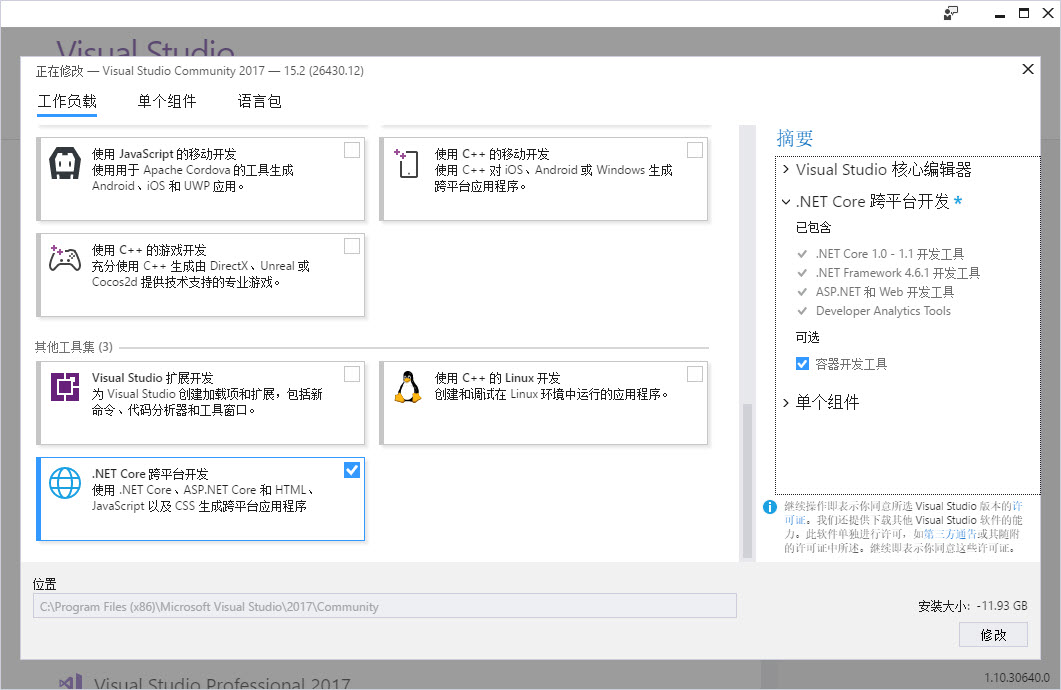
Select .NET Core cross-platform development option during installation
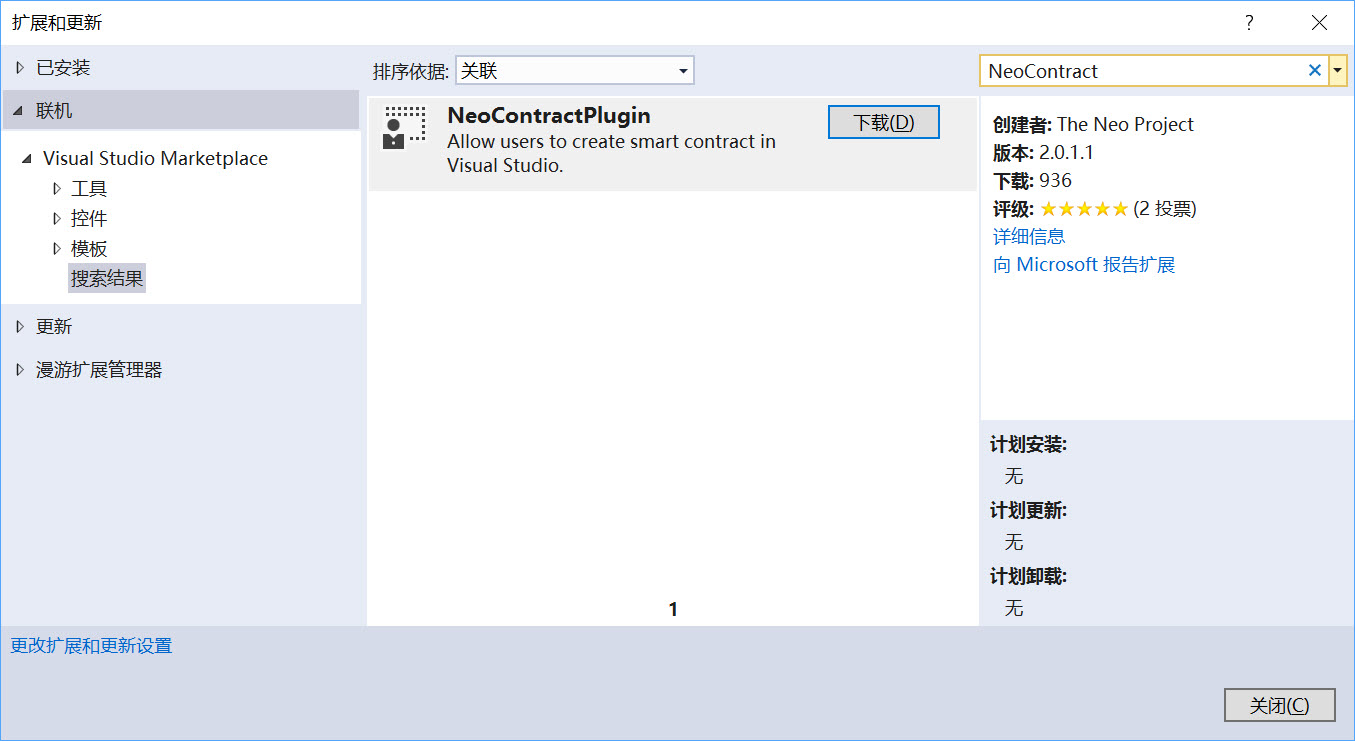
Install NeoContractPlugin
Open Visual Studio 2017 and click tool -> extensions and Updates,click onlineon the left column, search NEO and install NeoContractPlugin (the process must be completed online).
Configure neo-compiler
-
Download neo-compiler project to your localhost.
-
Click
file->open->project/solutionsin Visual Studio 2017 and select neo-compiler.sln in the project file. -
Right click neon project in the list and click
release. -
After the release path is configured, click
release.In my setting, a
neon.exefile is generated inxxx\neo-compiler-master\neo-compiler-master\neon\bin\Debug\netcoreapp2.0\publish -
Add the neon to the
PATHin system environment.For Windows10, press
Windows+S, input environment parameter and select edit the account’s environment parameters, and add it toPath.
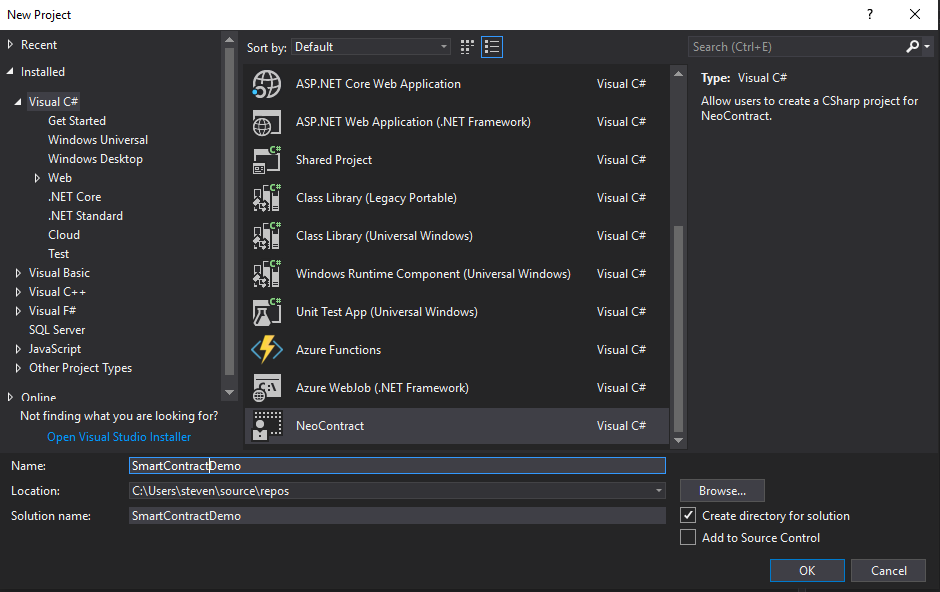
Create a smart contract project
- Click
file->create->project. - Select
NeoContractin the list and change settings where necessary, then clickconfirm.
 Â
Â
A C# file will be auto-generated after the project is created with a default class inherited from the SmartContract. As indicated in the screenshot below, now you have a Hello World contract.
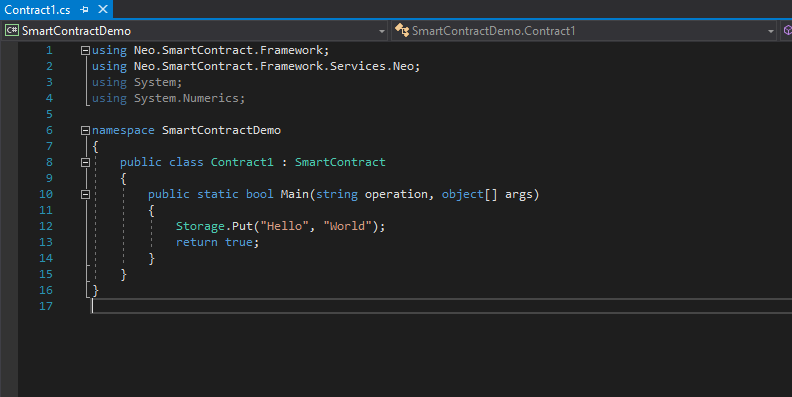
Nevertheless, the above only demonstrates a simple data storage method - to store data in private storage area using key-value method.
Next Step
Congratulations!, After set up the development tools, next step is to compile the contract, deploy it and invoke it.
Previous Step
If you are not set up the private chain yet , you may first click here.